ShopDreamUp AI ArtDreamUp
Deviation Actions


Description
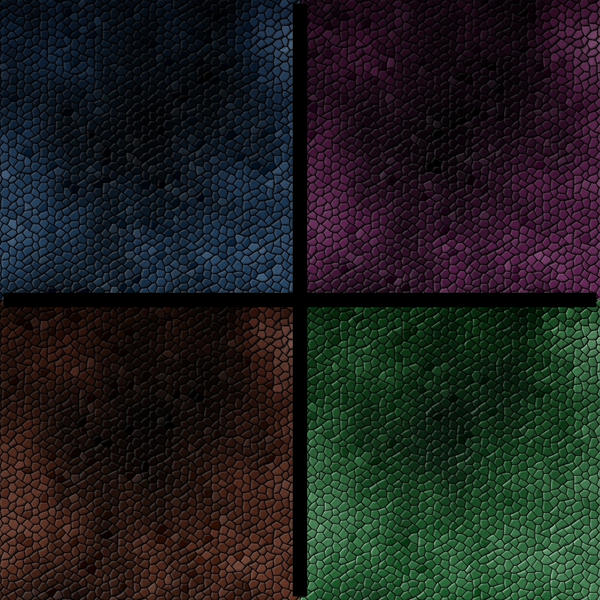
The snake skin pattern in four different colors was created using the following tutorial with modified steps in GIMP: [link]
These were the steps I used:
STEPS:
1. Create a new image (white background) of any size.
2. Apply the plasma filter (filter>render>clouds> plasma) with default settings
3. Desaturate the image (layer>colors>desaturate)
4. Give the layer some color using the colorize option (layer>colors>colorize) for a greenish yellow color set Hue to 150, Saturation to 50 and Lightness to 0
5. Now apply the mosaic filter (filters>distorts>mosaic), this will create a snake skin like pattern
6. Create a new layer called bump (white background)
7. On the new bump layer apply the plasma filter again (filter>render>clouds> plasma)
8. Again, on the bump layer desaturate the layer with (layer>colors>desaturate)
You should now have two layers, the bump layer and the background snake skin layer.
9. In the layers dialog box, click on the background layer (the one with the snake skin effect)
10. You have now selected the bottom layer, as the eye is still present on the bump layer you will only be able to see the top bump layer.
11. On the main image apply a bump map (filter>map>bump map) setting with bump map set to the bump layer. Leave the other settings as default.
12. Now you need to turn of the visibility for the bump layer, click on the eye next to the bump layer in the layers dialog box.
Finally we'll add a little bit of shading to the top of the image so its not so flat.
13. Create a new transparent layer, call it shadow and make sure that the background is set to transparent.
14. Select the gradient tool, ensure that the background color is white and foreground color is black.
15. In the gradient settings click on the gradient and choose the FG to transparent option.
16. In the main image click at the top of the image, drag the mouse towards the bottom and release. You've now added a black to transparent gradient to the new layer.
17. Change the shadow layer mode to overlay
18. Save as a .xcf file if you wish to modify the layers later, otherwise flatten the image (image>flatten image) and save as a jpeg file.
You're done.
Image size
1000x1000px 864.99 KB
© 2007 - 2024 pscyhe
Comments6
Join the community to add your comment. Already a deviant? Log In
cool patterns thank you  (Smile)")